How to set up a CDN in WordPress for faster load times
Want to make your WordPress website super fast for visitors both at home and abroad? Then a CDN (Content Delivery Network) is indispensable. Fortunately, with LiteSpeed Cache you can activate and integrate a CDN in just a few steps, for example through QUIC.cloud or an external provider.
In this guide we show you step by step how to do this. No technical hassle, just clear and quickly sorted.
What is a CDN and why does your WordPress website need one?
A CDN (Content Delivery Network) makes sure your website loads lightning fast, no matter where your visitor is located. Your content (such as images, scripts and pages) is distributed worldwide across multiple servers, so visitors fetch data from the nearest location.
The benefits of a CDN for your WordPress website:
-
Faster load times worldwide
-
Less load on your own server
-
Higher SEO ranking (Google loves speed!)
-
A better experience for your visitors
LiteSpeed Cache including CDN at Theory7
When you choose WordPress hosting or web hosting at Theory7, you get instant access to LiteSpeed technology, the fastest web server on the market. With the LiteSpeed Cache plugin you activate the powerful, free and included QUIC.cloud CDN in a few clicks, without any extra technical hassle.
Why Theory7 is ideal for setting up a CDN:
-
LiteSpeed standard in every hosting plan
-
QUIC.cloud easy to activate through LiteSpeed Cache
-
Premium phone support 7 days a week
-
Lightning-fast performance at no extra cost
So you no longer need to look for a separate CDN service or deal with difficult integrations: it's simply included!
Step 1: Check whether you use LiteSpeed Cache
Before you can connect a CDN, you need the LiteSpeed Cache plugin. It's free and works perfectly with the Theory7.net platform.
-
Go to your WordPress dashboard by logging in to your WordPress website.
-
Check whether you see
LiteSpeed Cachein the menu -
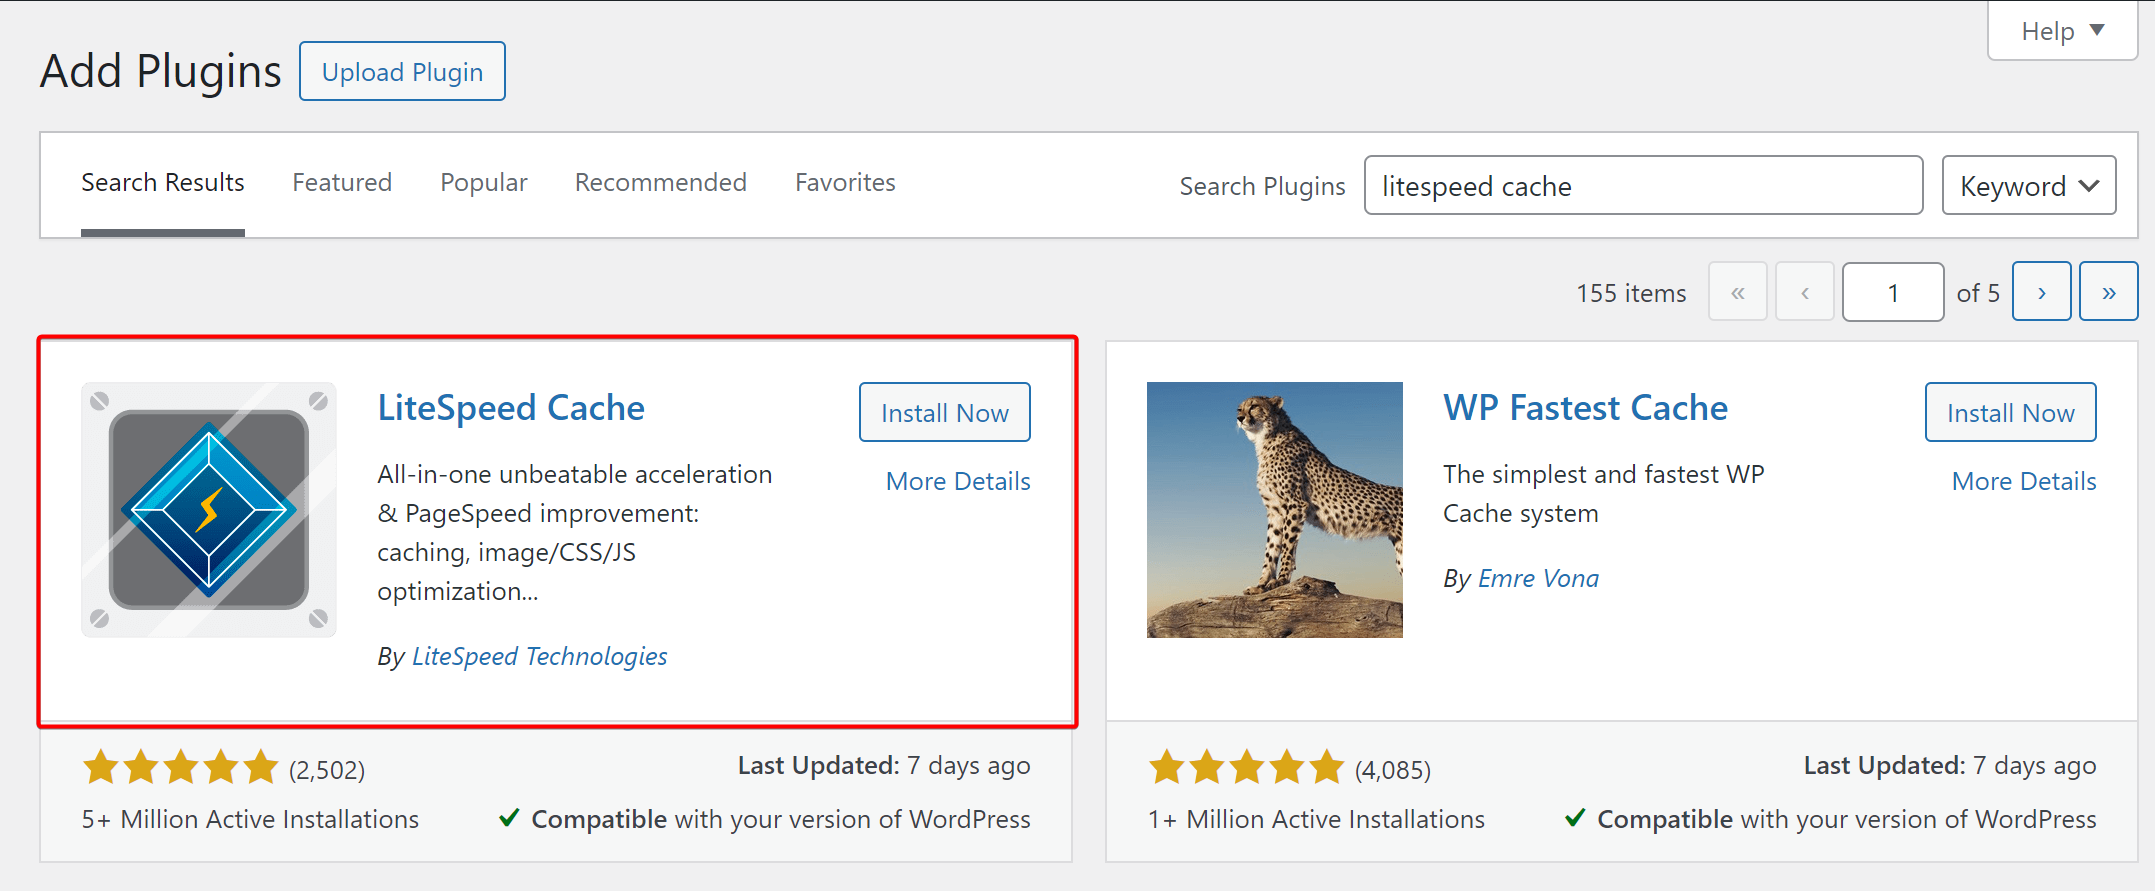
If not? Install the plugin through
Plugins > Add New Plugin > LiteSpeed Cache. We have also written an in-depth guide on how to install LiteSpeed Cache.
Step 2: Activate the domain key (QUIC.cloud)
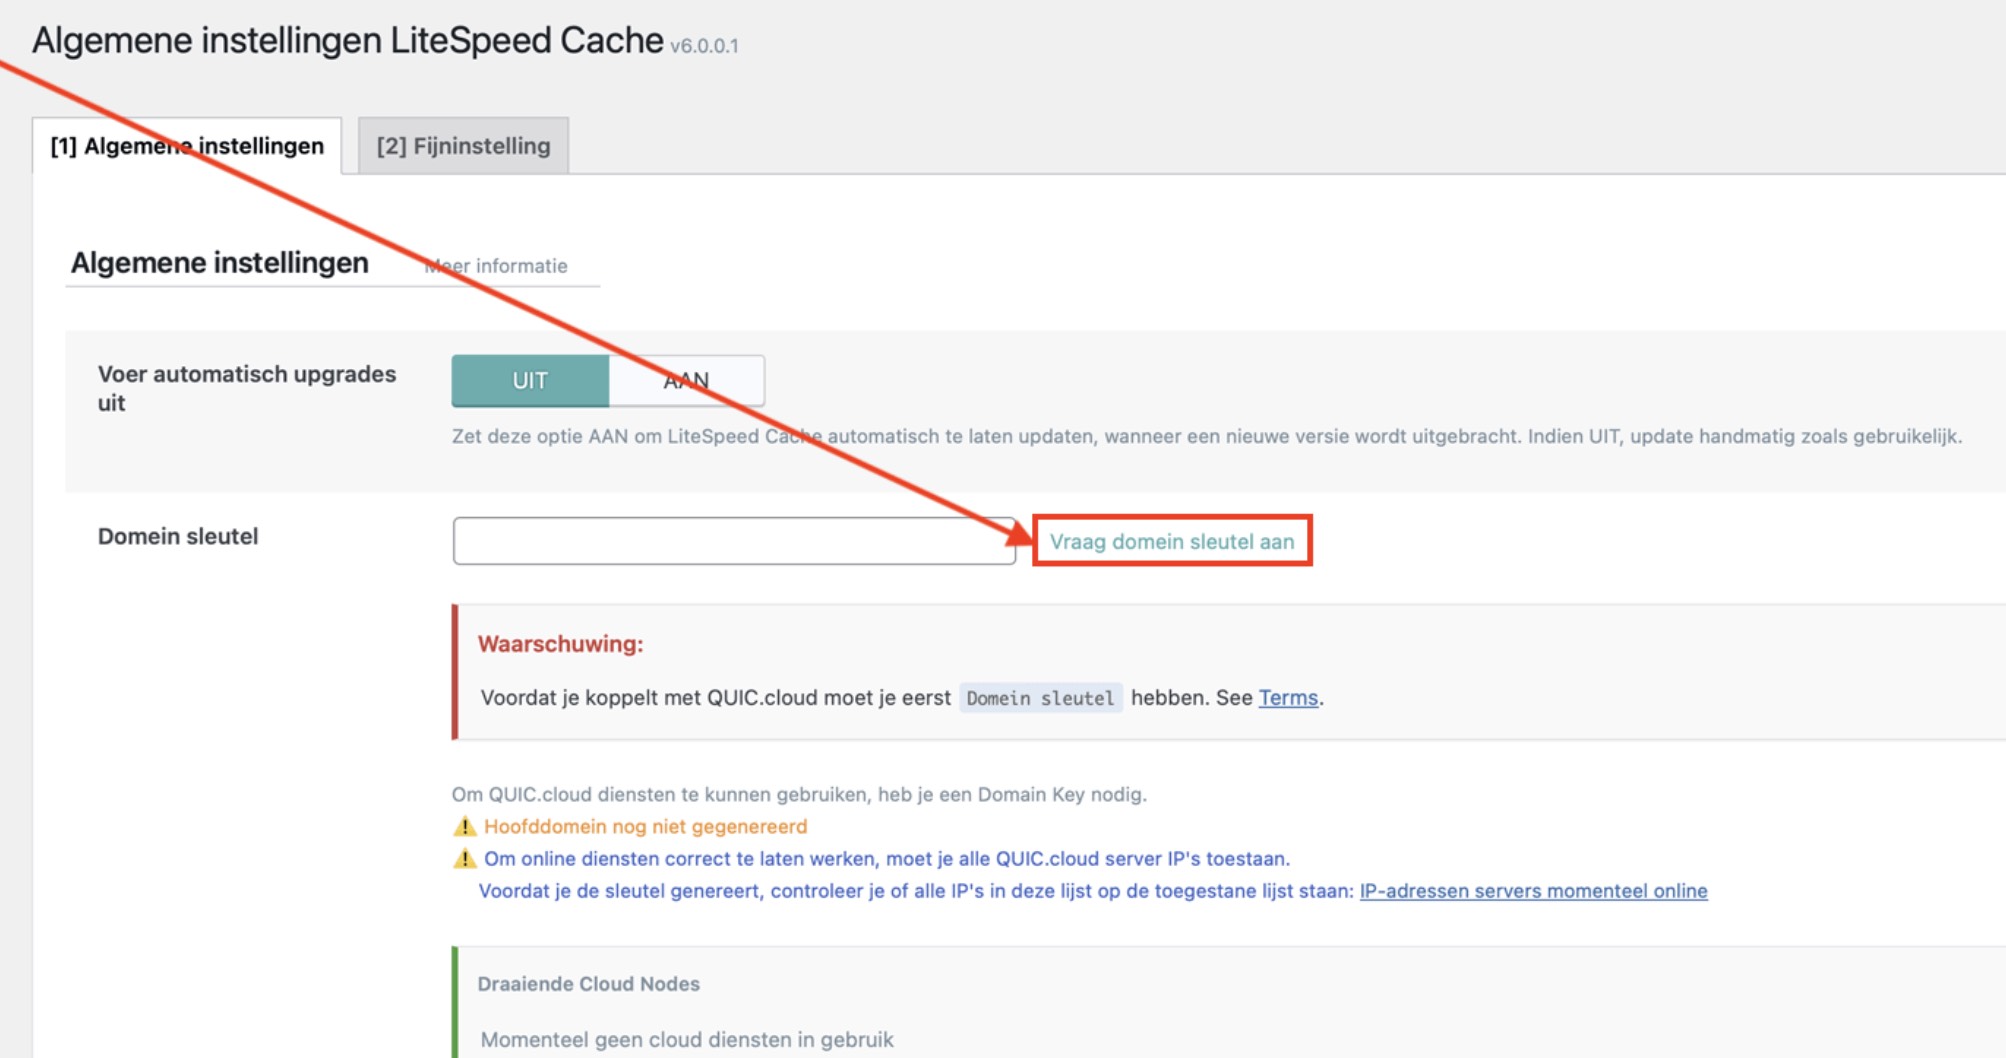
QUIC.cloud is LiteSpeed's own free CDN. To use it, you need to request a domain key.
-
In your WordPress website, go to
LiteSpeed Cache > General -
Click Request Domain Key
-
Wait until the key has been generated
-
Click Link to QUIC.cloud
Your website is now linked to QUIC.cloud and you can manage CDN actions.
Step 3: Enable the CDN in LiteSpeed Cache
-
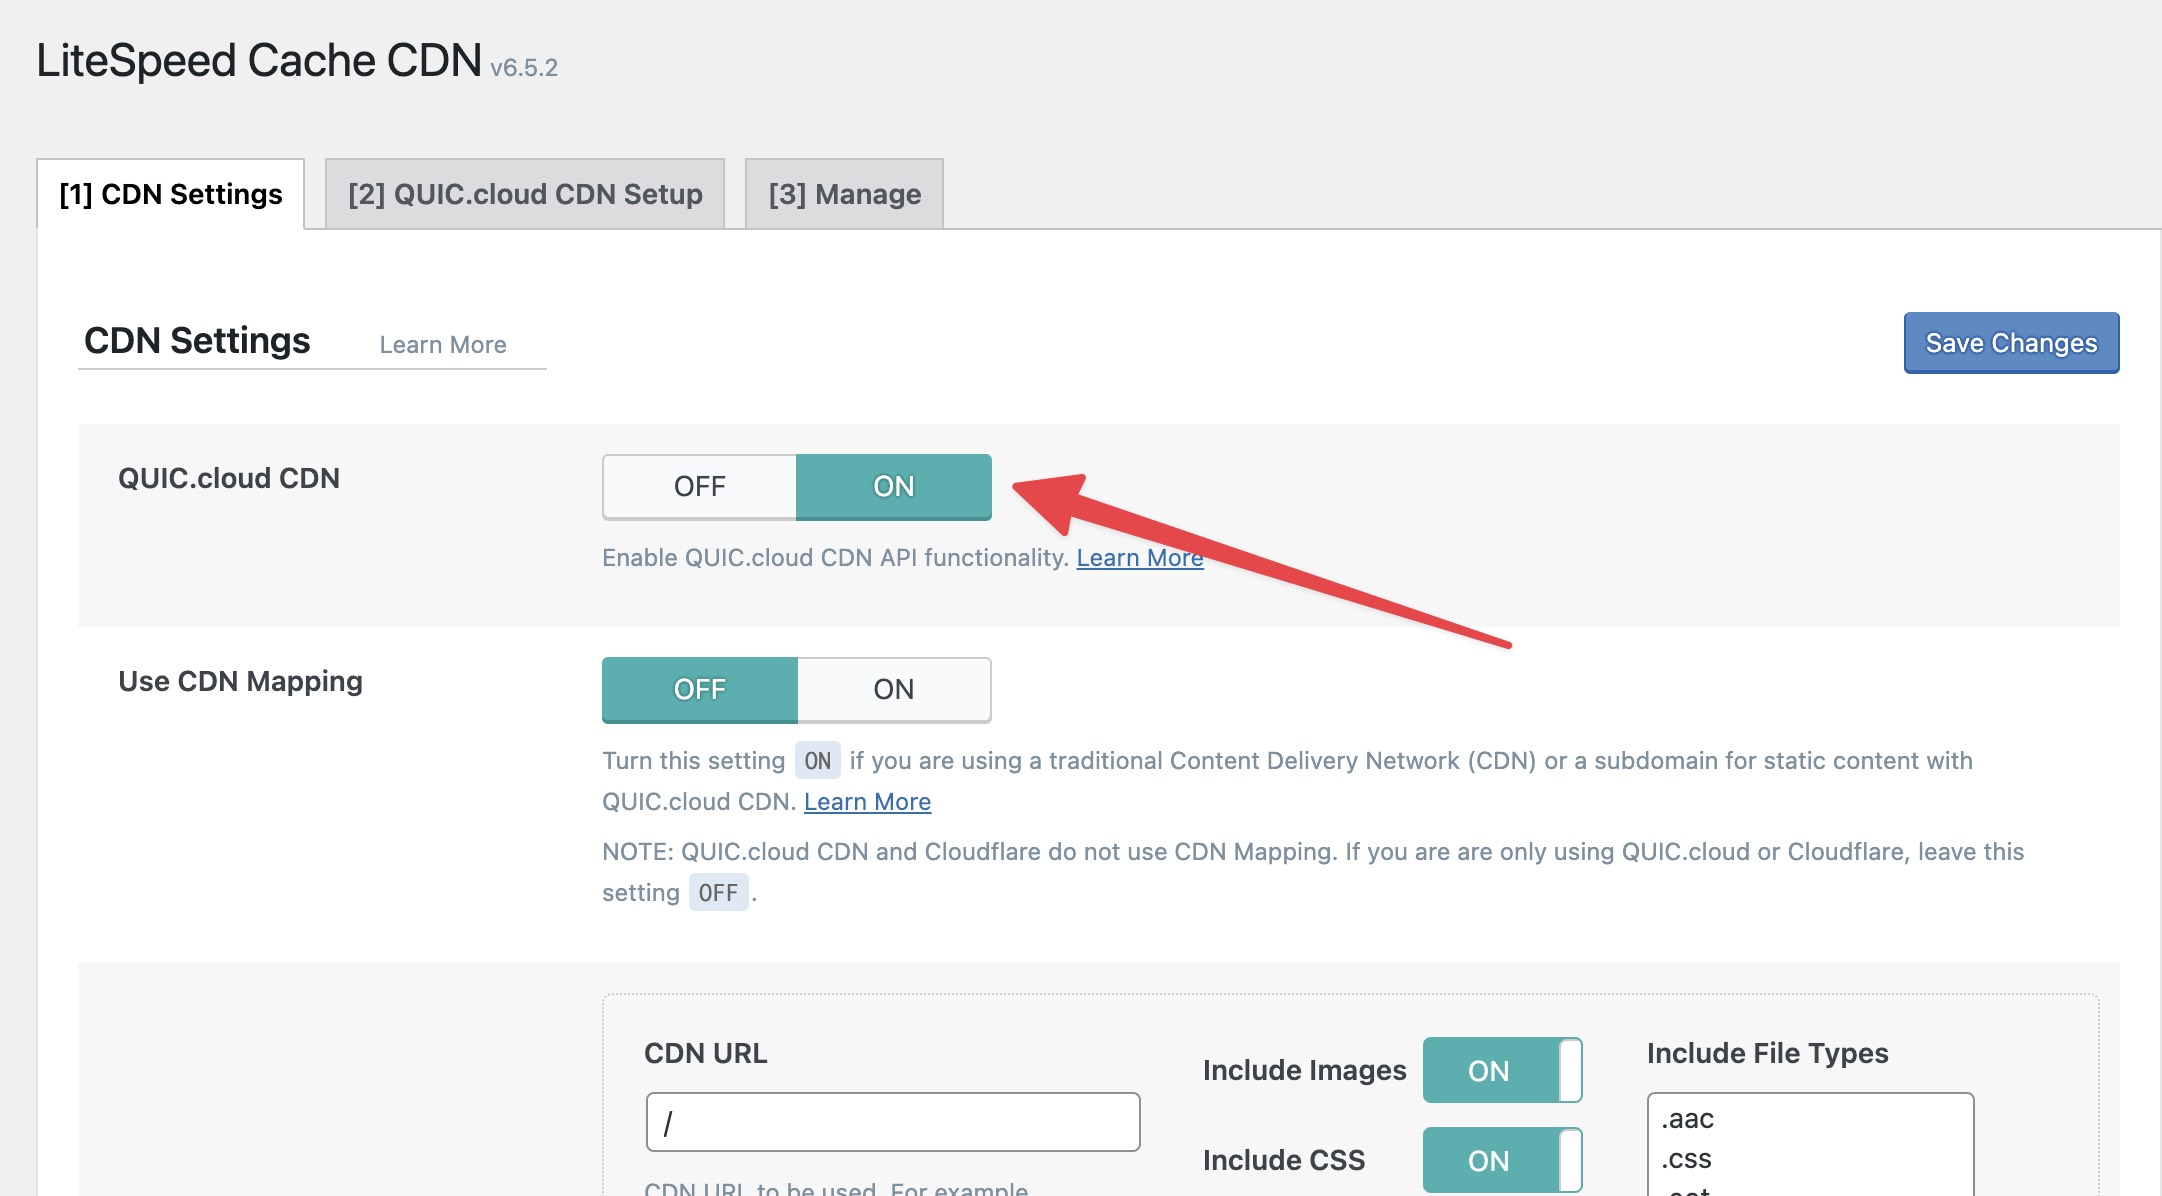
Go to
LiteSpeed Cache > CDN -
Set QUIC.cloud CDN to
Enable -
Save your settings
Optionally, you can integrate other CDNs, such as:
-
Cloudflare
-
BunnyCDN
-
KeyCDN
In that case you enter your CDN URLs under CDN Mapping (for example cdn.yourwebsite.com). This is set up correctly by default, so you don't need to change anything there.
Step 4: Update your DNS (QUIC.cloud only)
Are you using QUIC.cloud for caching and CDN? Then you need to update your DNS records.
-
Go to the DNS settings of your domain name. You manage these in DirectAdmin under DNS Management. If you can't figure it out, we'll of course be happy to set this up for you!
-
Change the www A record to the QUIC.cloud IP address
-
Or use CNAME records if needed
Note: DNS changes can take a few hours before they are active worldwide.
Step 5: Use the 'Presets' for a flying start
Don't feel like going through every setting one by one? You don't have to. LiteSpeed Cache has a super handy feature: Presets. These let you activate a complete set of optimal settings with a single click.
How to set the recommended preset:
-
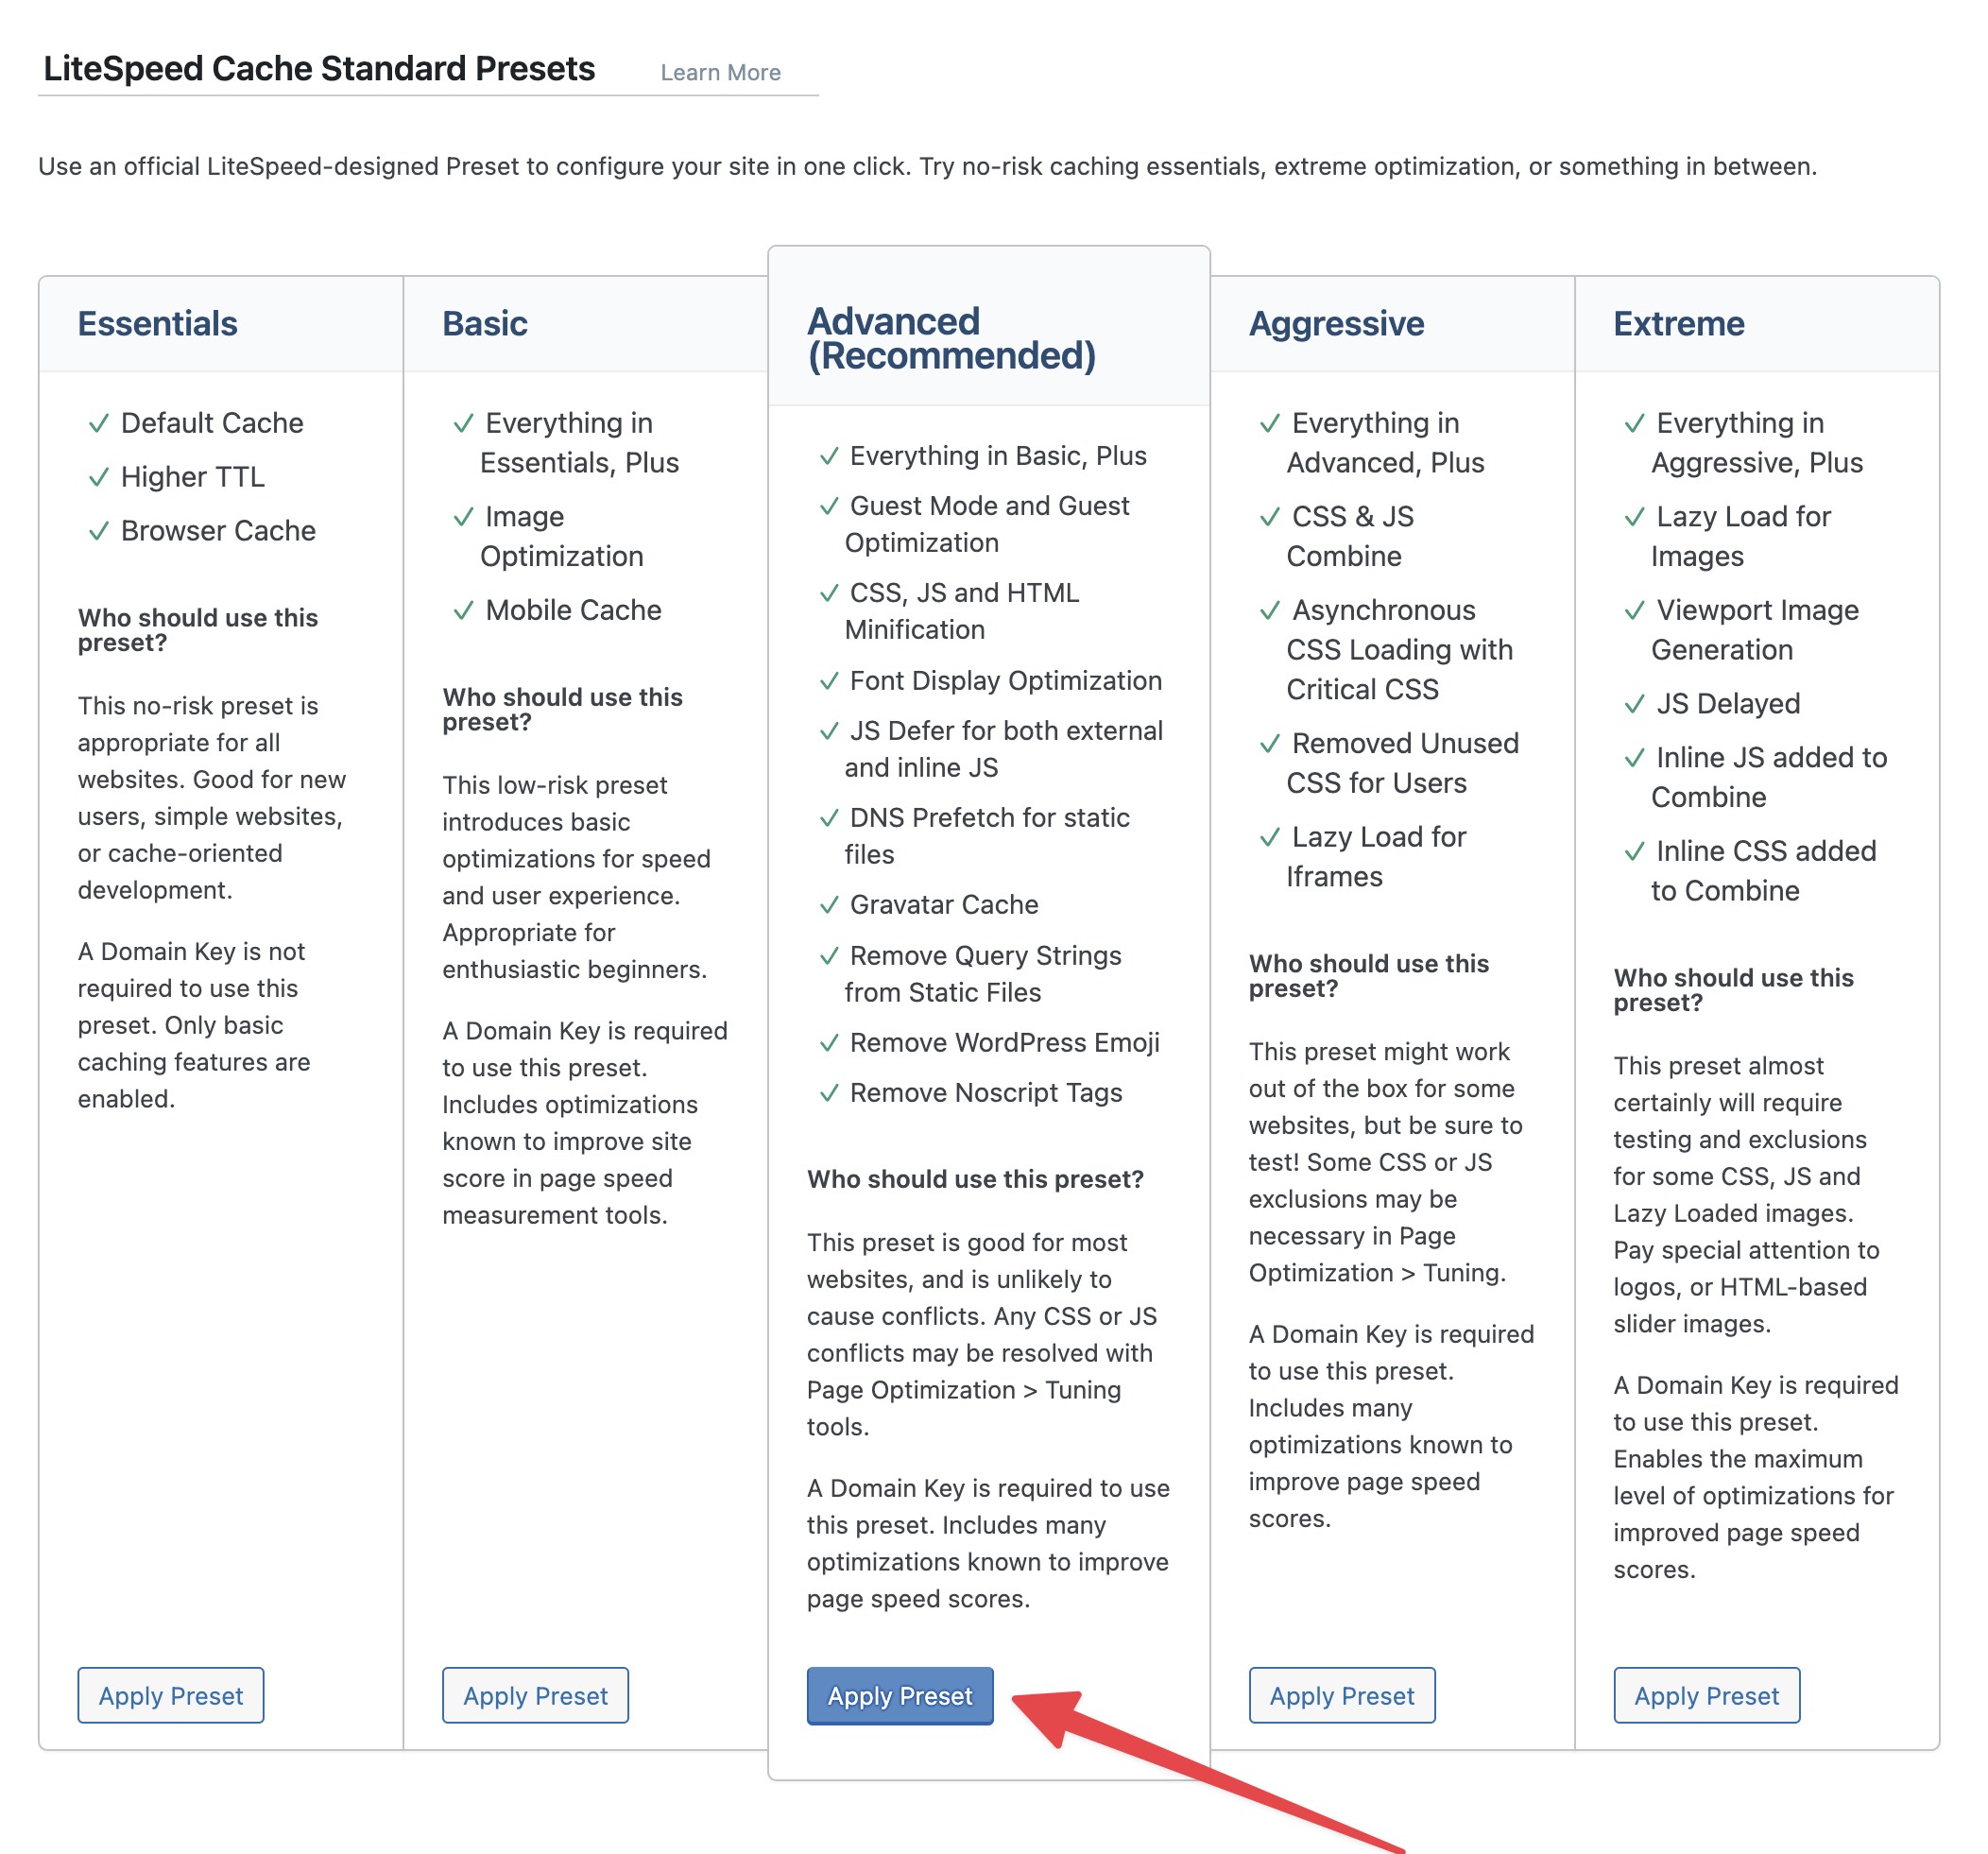
In your WordPress dashboard, go to
LiteSpeed Cache > Presets -
Here you see several presets, such as:
-
Essentials
-
Advanced
-
Aggressive
-
Extreme
-
-
Choose the Advanced / Recommended preset
-
Click Apply Preset
This preset is perfectly balanced: advanced optimizations, but without the risk of errors or conflicts with your theme or plugins.
What exactly does this preset do?
The Advanced preset:
-
Turns caching on completely
-
Activates CSS/JS minification and lazy loading
-
Optimizes images
-
Turns on database cleanup
-
Combines smart settings for both performance and compatibility
💡 Tip: Want to fine-tune things later? No problem. After applying the preset, you can still adjust every part manually under the various LiteSpeed Cache tabs.
Step 6: Let the CDN do its job and optimize further with our help
Great! If you've gone through the steps above and activated the Presets, your site is almost ready to fly. The only thing left is a little patience.
When does the CDN start working?
After setting up the CDN (through QUIC.cloud or another provider), it usually takes 2 to 4 hours before traffic runs fully through the CDN. This is because DNS changes need some time to propagate worldwide.
Once that has happened:
-
Your website is delivered through the fastest routes
-
All your visitors benefit from lightning-fast load times
-
Your site is optimally configured for top performance and SEO
Need help? We're here for you!
Want an extra check that everything is set up perfectly? No problem.
Our helpdesk is happy to take a look with you. We can:
-
Review your settings
-
Apply extra optimizations and tuning
-
Advise you on upgrades such as Redis, WebP or premium CDN tiers
Get in touch through our support page or send us a message directly: we'll help you out in no time.
Extra tips
-
Combine it with object caching (Redis/Memcached) for ultimate performance
-
Also use QUIC.cloud for image optimization (this happens automatically through the presets)
-
Don't turn on other caching/CDN plugins at the same time, as that causes conflicts
Frequently asked questions
Is QUIC.cloud free?
Yes, you get free CDN traffic and optimization credits. For larger websites you can upgrade at a low cost.
Can I also use Cloudflare?
Definitely! Cloudflare also works well with LiteSpeed, but it requires a separate configuration (adding an API key, setting up DNS).
What if I already use a CDN?
Make sure you don't optimize twice (for example, minification through multiple plugins). Let LiteSpeed Cache take charge.
CDN in WordPress
With LiteSpeed Cache, activating a CDN in WordPress is truly a piece of cake. And with Theory7's LiteSpeed hosting you can be sure you get the most out of your site.
Want to know more about lightning-fast WordPress hosting? See our plans at Theory7.net/en/wordpress-hosting
0 van 0 vonden dit nuttig
