The Theory7 Quick Guide: Getting Started
Welcome to Theory7! Great to have you as part of our community.
With our quick guide we help you get going fast, from buying your domain name and installing your website to setting up and using your email address. Are you more experienced and would you rather decide the order yourself? That is fine too, of course, and we are happy to refer you to this page.
Below is a summary of the steps we will go through. Feel free to scroll to them or start at step 1.
- Link your domain name to your package
- Log in to your hosting package
- Build your website with WordPress
- Build your website with our Sitebuilder
- Create your email address
- Add your email address to your devices
- All about our (awesome) support
Step 1: Link your domain name to your hosting package
If your domain and package are in the same account, you are done in just a few clicks. Is the domain under another user or with another provider? That is no problem at all either.
My domain is in my Theory7 account
- Log in to the correct account, the one that holds both the domain and the package.
- In the top menu, click 'Domeinen' (Domains) and then 'Mijn Domeinen' (My Domains).
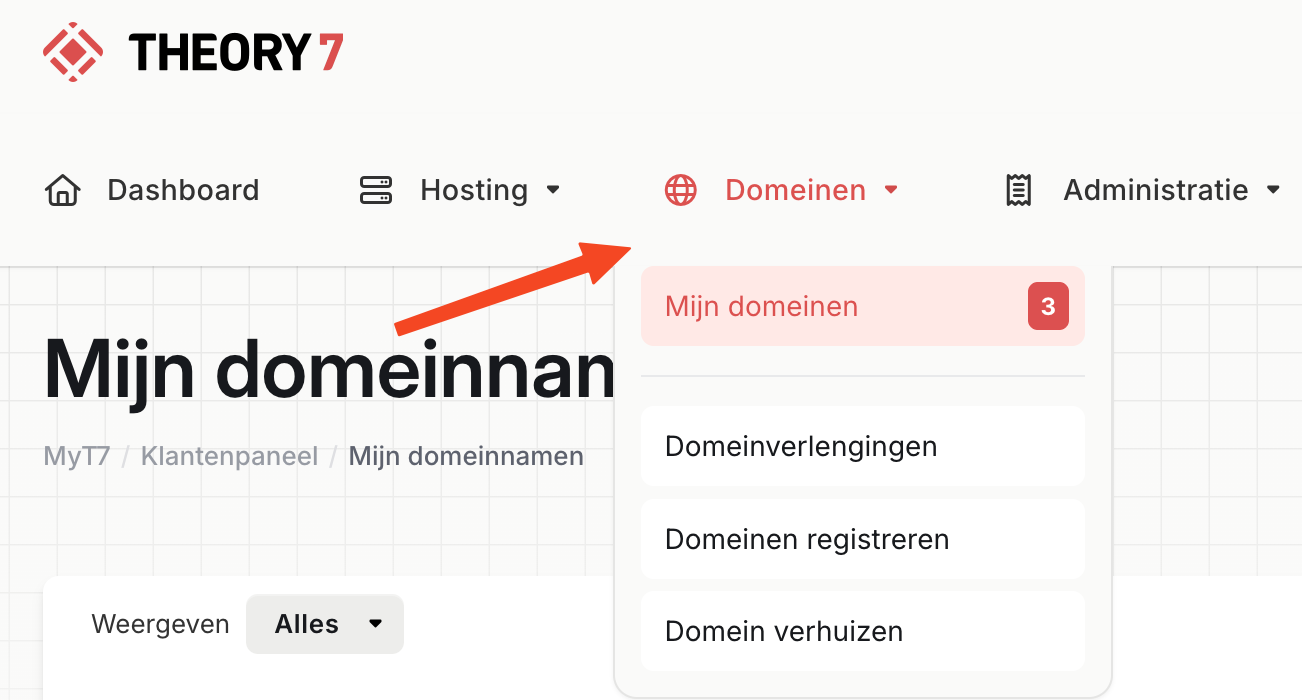
- Click 'Beheren' (Manage) next to the domain you want.
- Then, in the window, click 'Koppel aan hostingpakket' (Link to hosting package) and select the package you want.
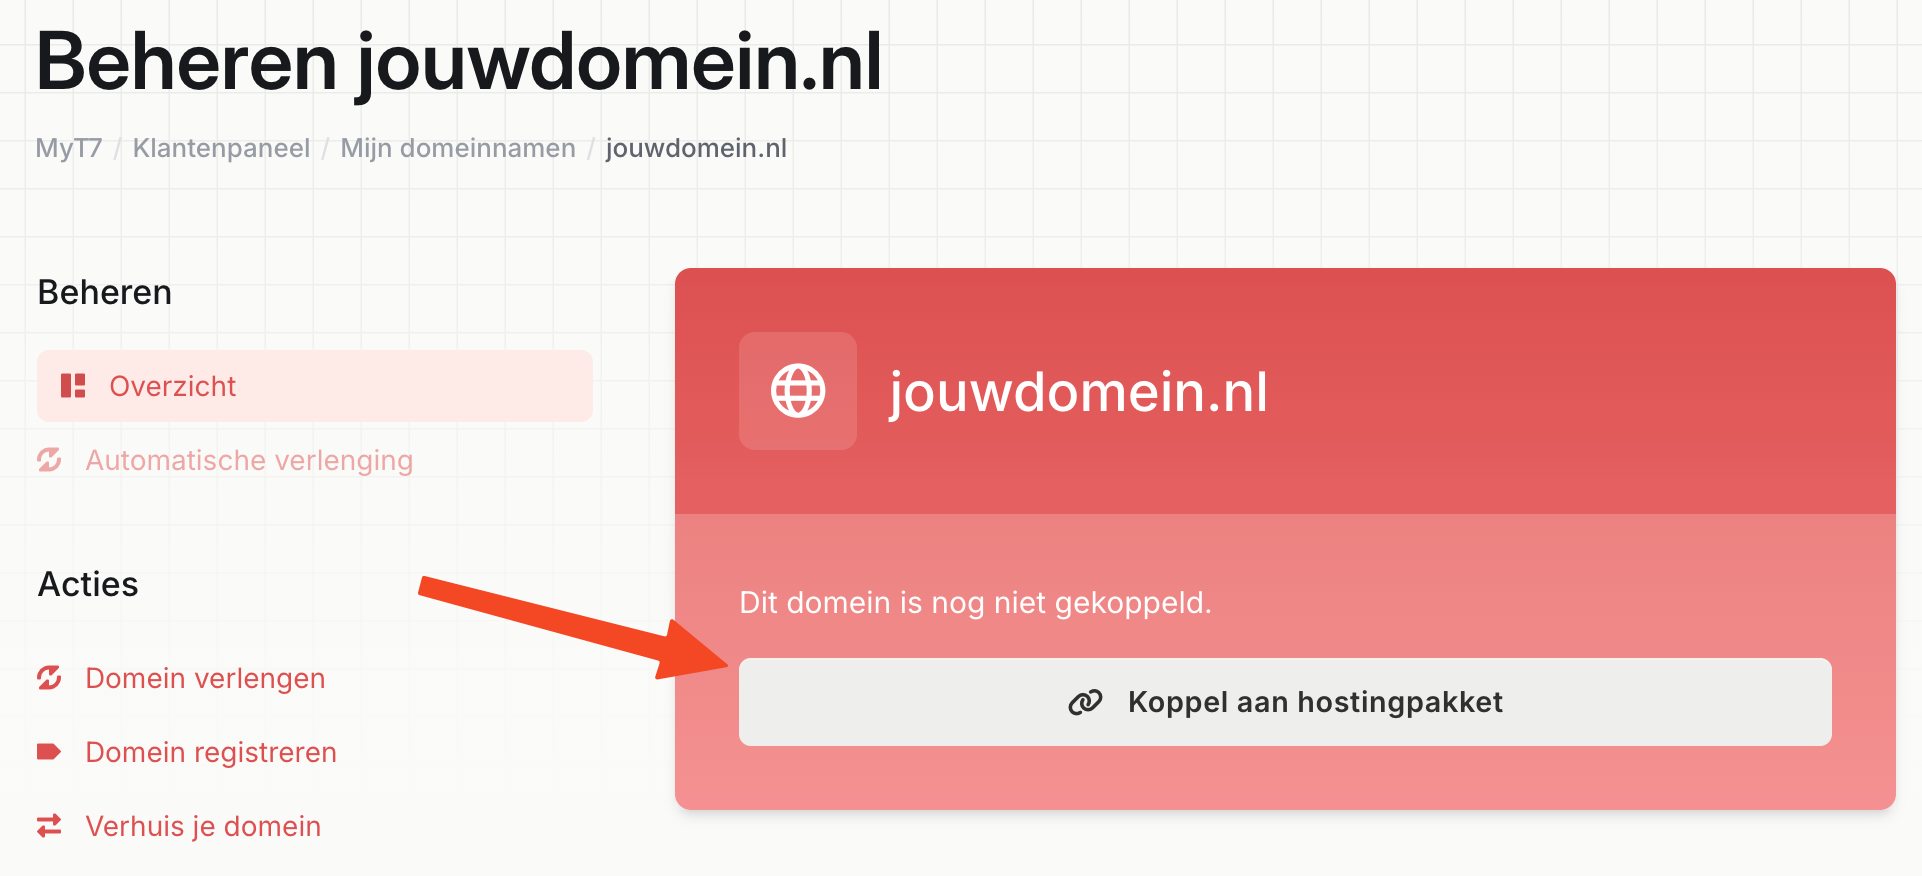
You have now successfully linked your domain to the package you want!
Keep in mind that it can take up to 4 hours before this is visible to everyone and the DNS has been fully processed.
My domain is not (yet) with Theory7
The following steps can differ per provider, but we try to keep them as general as possible.
- First add the domain to your hosting package.
- Log in at the provider where the domain is registered.
- Go to the domain management for the domain, often under Domains > My Domains
- Change the nameservers to those of Theory7.net.
| Nameserver 1 | ns.theory7.eu |
| Nameserver 2 | ns.theory7.net |
| Nameserver 3 | ns.theory7.nl |
Depending on the processing time of your current provider and DNS processing, it can take up to 4 hours before your domain is linked to the package.
Step 2: Log in to your hosting package
- At the top, click 'Hosting' and select your package in the drop-down menu.
- Then click: Mijn pakketten (My packages):
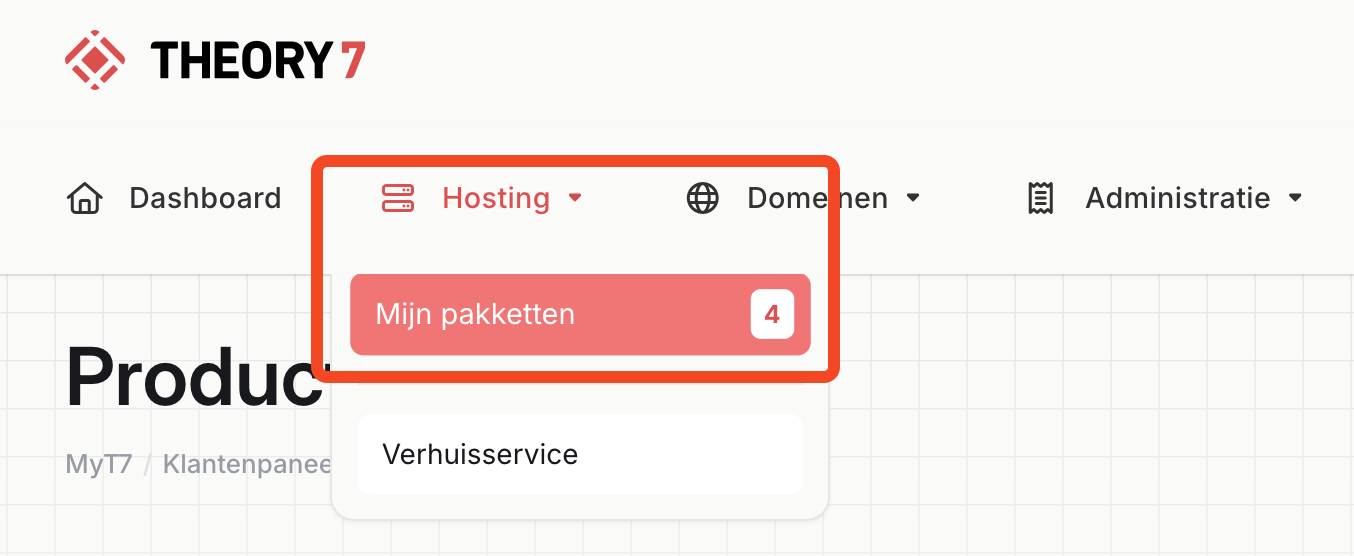
- Next, click the package you want to log in to.
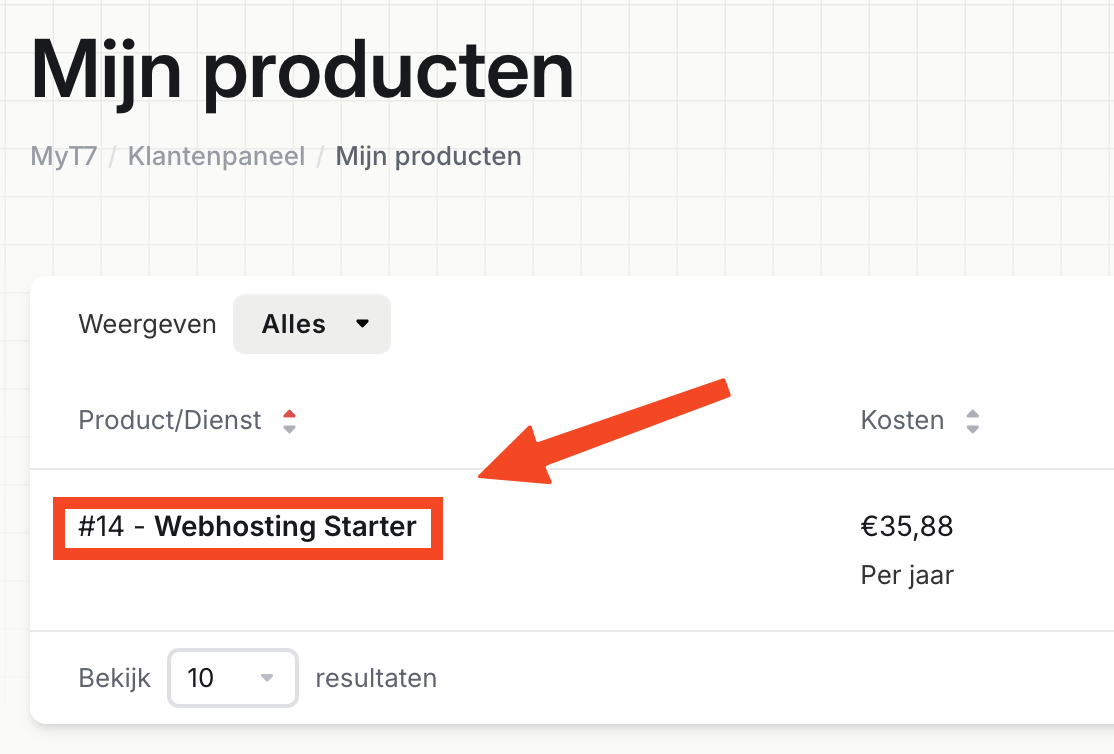
You now see an overview of all the features of your package. Super handy. But of course you want to log in now.
- Scroll down a little until you see "One Click Login" on the left
- Click Direct Admin or click the Direct Admin image:
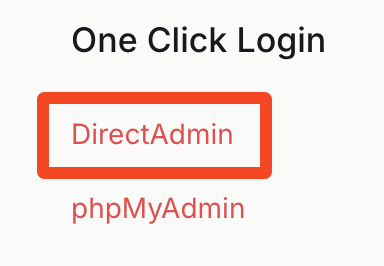
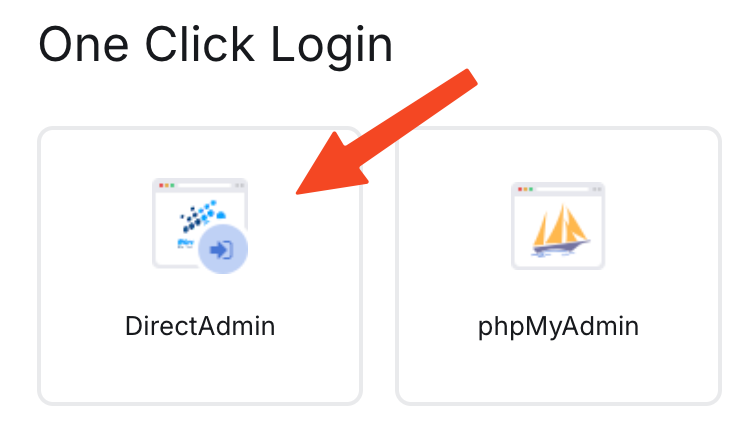
The page redirects you automatically and you are now logged in to DirectAdmin, and with that to your hosting package.
Would you rather log in manually? Then we are happy to explain how to do that.
Step 3: Install a website
You can build your website in several ways, and there are many systems that can help you with it. To keep things simple, we will now get started with an easy WordPress installation and with our own Sitebuilder.
Build your website with WordPress
To get started with WordPress, you first need to log in to your hosting package. Follow the previous step for that (step 2). Are you logged in? Then we continue below:
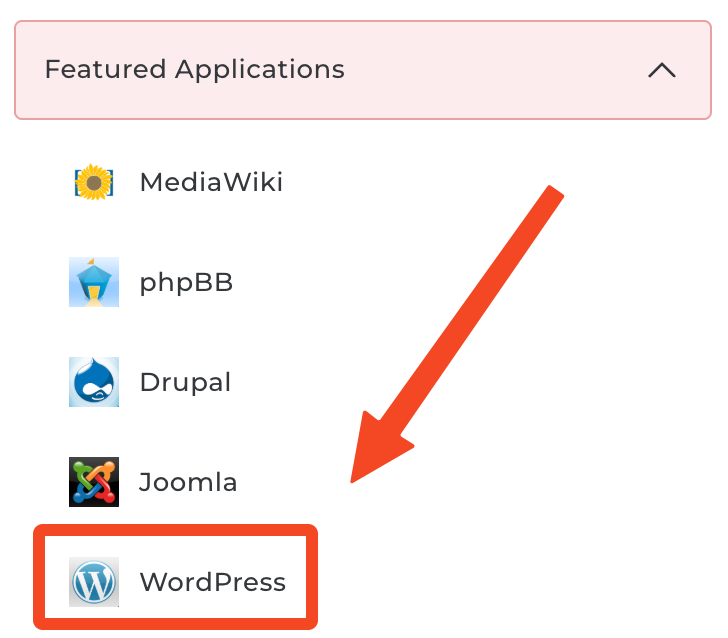
- In your package, click ‘Featured Applications’ on the left
-
Select the WordPress option:
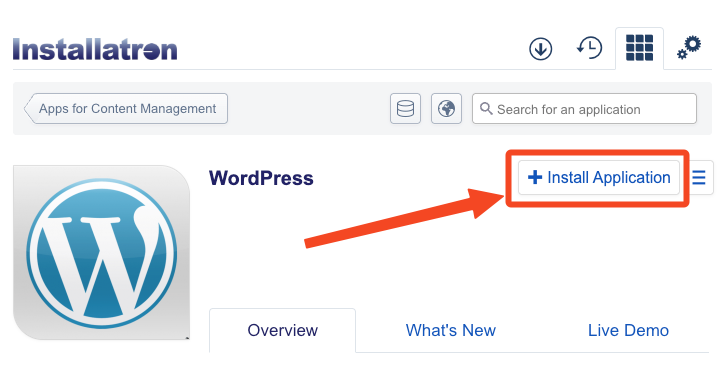
- You now see the Installatron installation screen. Then click Install Application on the right:
Now fill in the installation form as follows:
- Select the correct domain, but make sure you select https://www. With an 'S' after http.
- So for example: https://www. yourdomainname.nl
- In the Directory field, enter a ‘/ character’ or leave it empty:

Under 'Settings', fill in the following:
- Administrator Username
The username you want to use to log in to your website. - Administrator Password
The matching password. The password is hidden by default; you can make it visible by clicking ‘show password’ on the right. You can also generate a password automatically. - Administrator Email
Enter an email address here where you want to receive the email related to the maintenance of your website. - Store these details carefully!
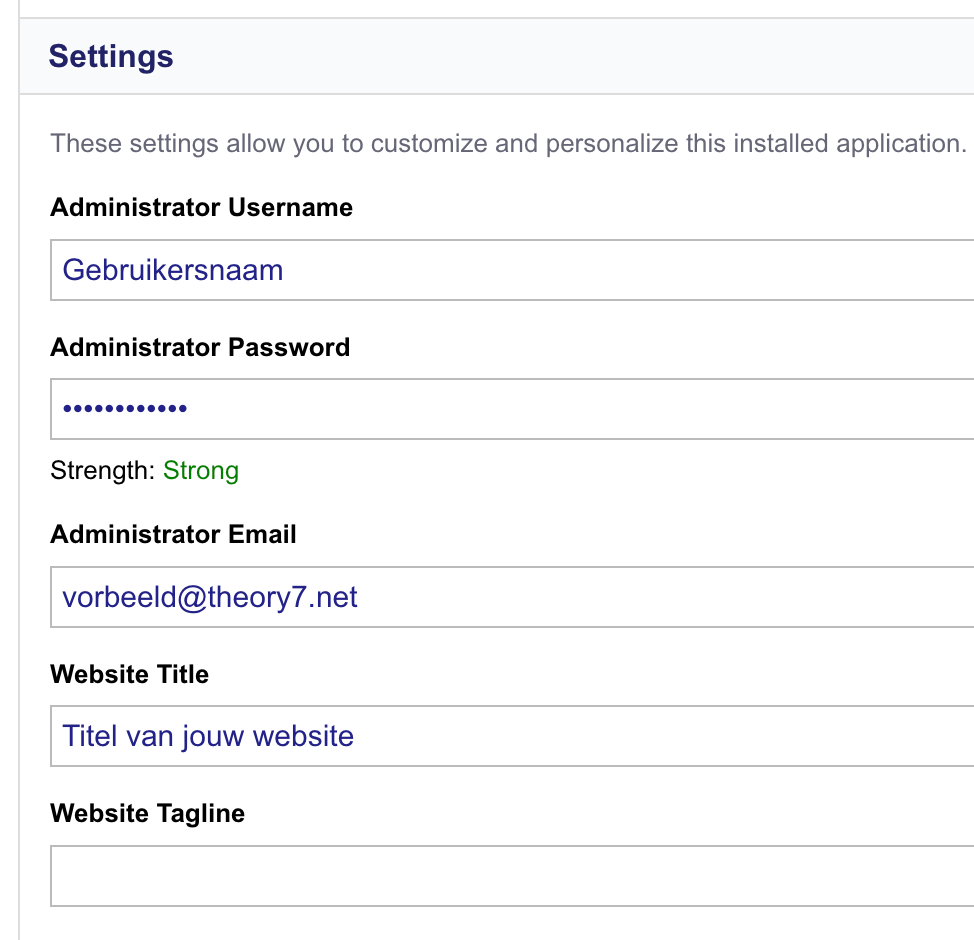
We leave the rest of the settings as they are for now. You can always change them later.
- Then click Install in the bottom right.
- and... done!
In a few seconds, your WordPress website is live. In the next window you can log in, start building or change settings as you like. It is that easy!
Build your website with our Sitebuilder
To get started with our Sitebuilder, you first need to log in to your hosting package. Follow the previous step for that (step 2). Once you are logged in, we continue below:
- In Direct Admin, click the arrow (on the left) next to 'Extra Features.
- In the drop-down menu that opens, click the 'Sitebuilder option
- Sitebuilder is now open and you can get started right away on your dream website!
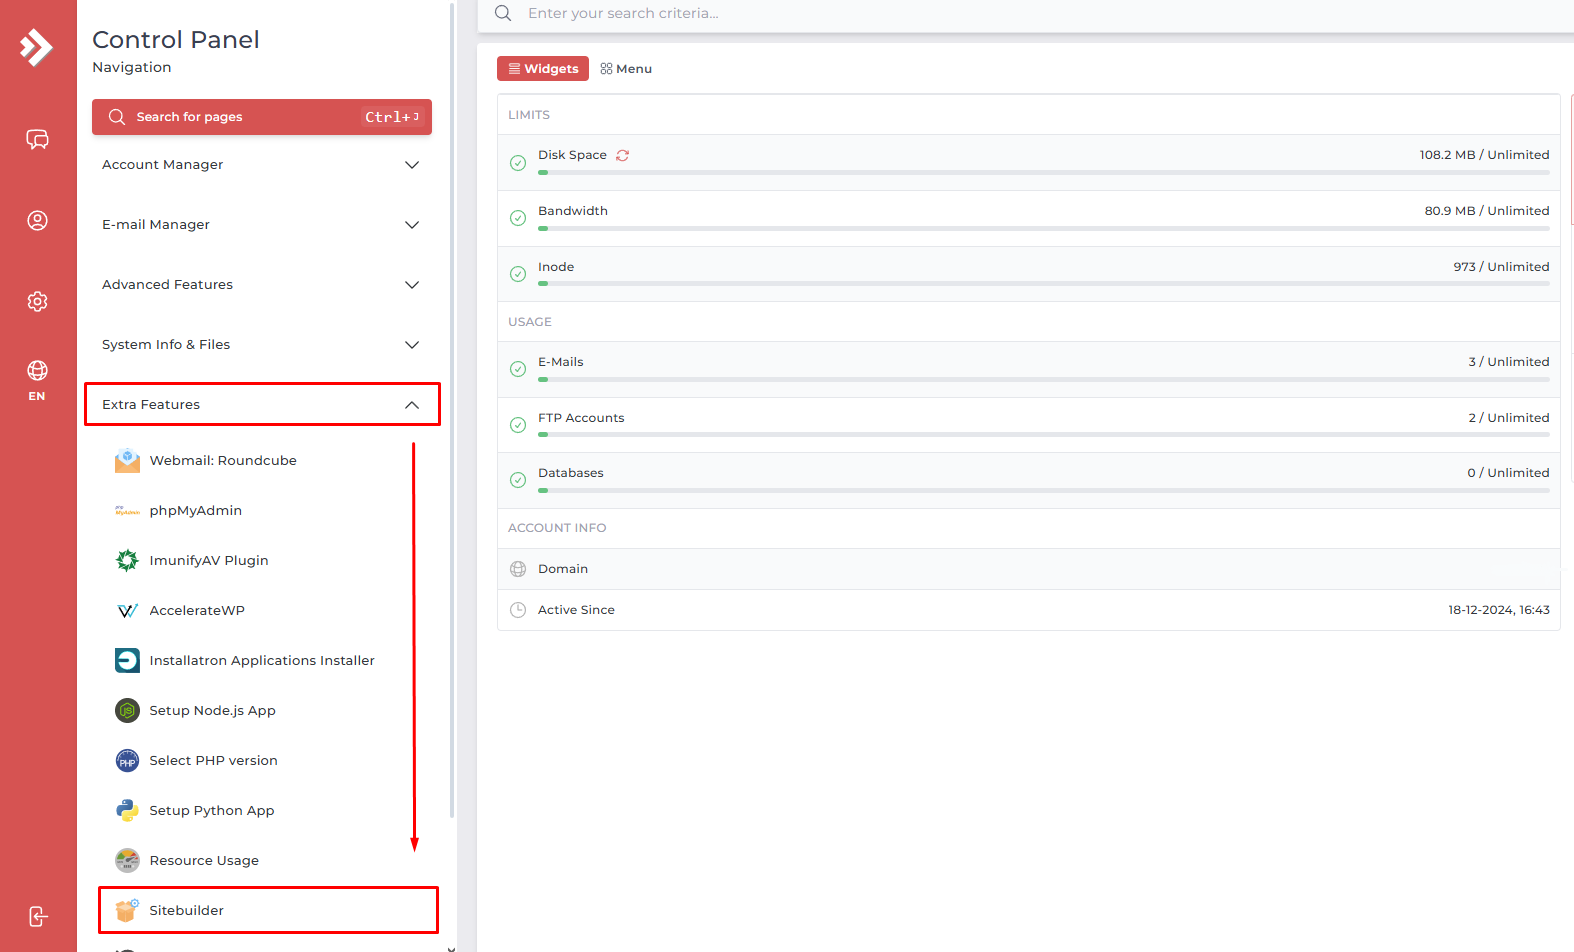
Managing multiple domains
If you use multiple domains on the package, make sure you select the domain you want to use Sitebuilder for at the top right of the page.

Step 4: Create your email address
Again, first log in to your hosting package; follow step 2 for that.
Once you are logged in, you see an overview of all the features of your package.
- Then click Email Accounts:
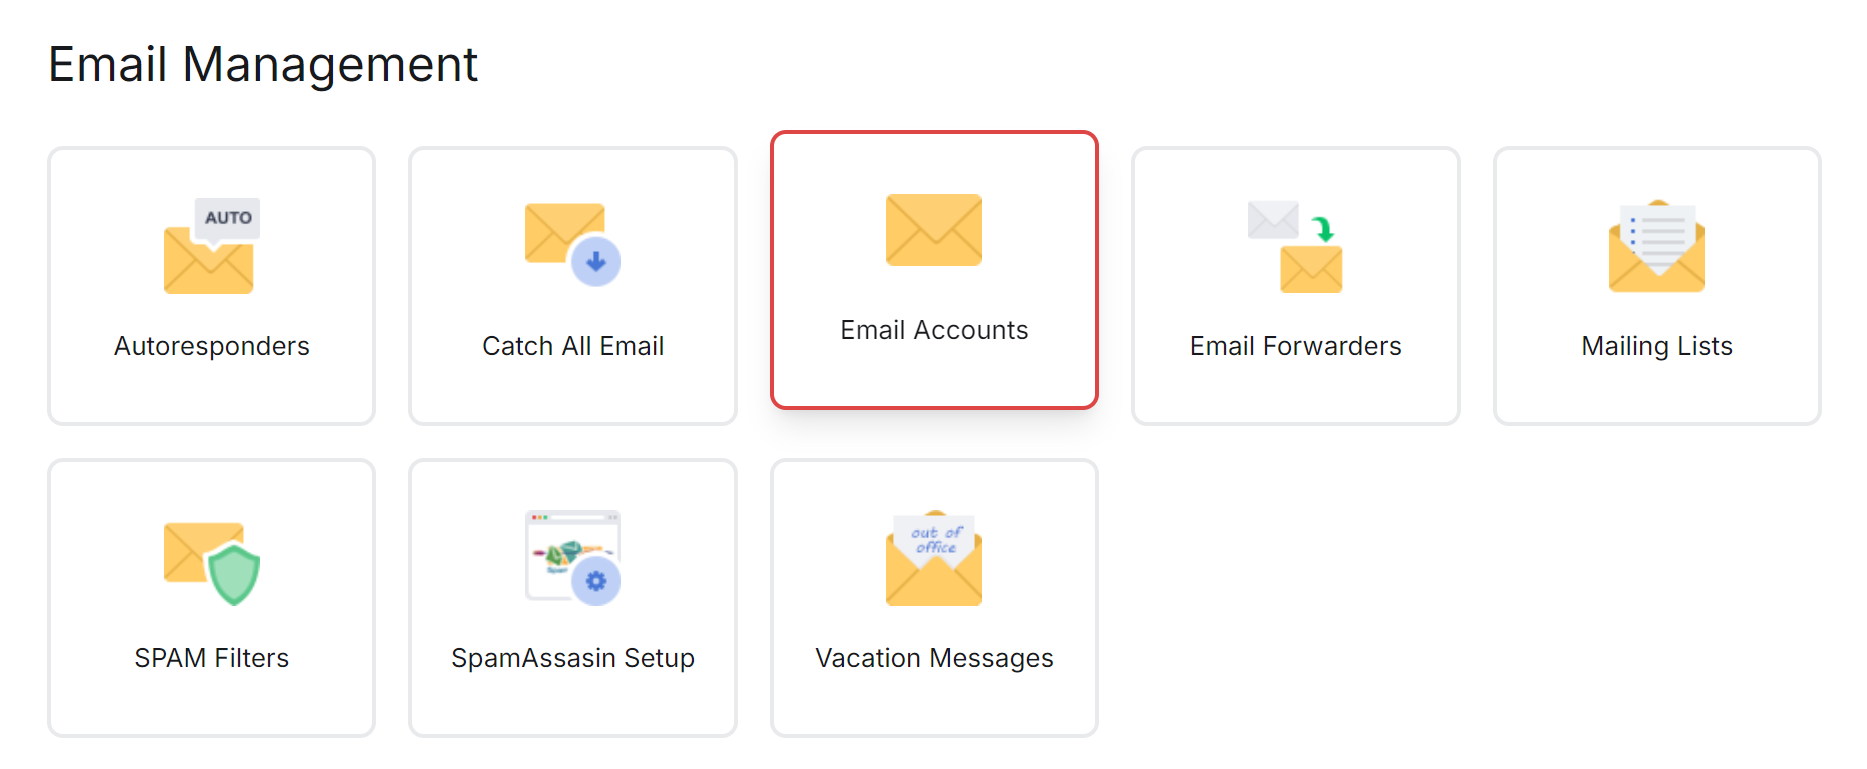
-
Click Create Account and fill it in as you like:
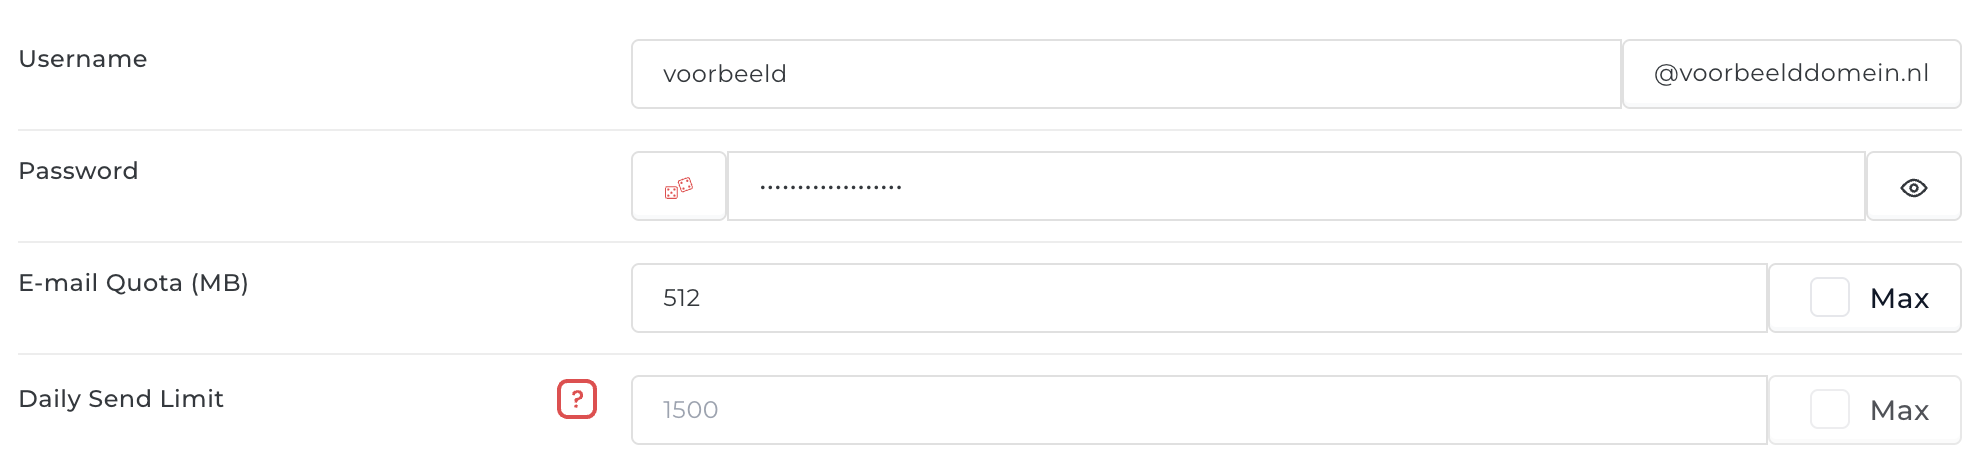
Account The email address itself, for example: info @ yourdomainname. Password The password you want to set for the email account. Quota Here you can choose how much storage (in MB) this mailbox may use. You are always still bound by the limit of your package. Unlimited quota means you may use the entire storage of the package. Send limit Here you can choose how many emails may be sent per day. You are always still bound by the limit of your package. Unlimited send limit means you may use the limit of the package. Tip: Use the Generate button to create a strong password.
- Click Create and you are done.
Your email address is active right away and ready to use!
Step 5: Add your email address
To add your email address to your system (such as your phone), you need our mail server details. Because there are many systems, such as Windows Mail and Mail for iOS, we have created a separate guide for each device.
- Our mail server details.
- Office 365 (formerly Outlook)
- Add email to Gmail
- Set up email on iOS / iPhone
- Add email to macOS
Step 6: Theory7's (awesome) support
We keep expanding our knowledge base, so check our support page regularly for the latest guides. Although we do our best to keep our environment and services as simple and clear as possible, it can of course happen that you get stuck somewhere or simply have a question. We are always here for you!
0 of 0 found this helpful
